Monday 1 August 2016

Message Logging with OWSM

Decided to document a very easy yet handy policy from OWSM usage and probably one of the most used: oracle/log_policy. 

This policy causes the request, response, and fault messages to be sent to a message log and can be attached either from JDeveloper to your services or references or from the OFWM Enterprise Manager for run time attachments.


Do not forget to increase the log level of oracle.wsm.log.model.MessageLog to Trace32 so you can have the messages log.


The log location is [domain-home]/servers/[soa-managed-server]/logs/owsm/msglogging
The log with the name: diagnostic.log


Tuesday 21 June 2016

Upgrading to SOA 12.1 & 12.2 - Practical Steps and Project Experiences

At the same day that Oracle announces the release of Oracle SOA Suite 12.2.1.1 I'm presenting at UKOUG Application Server and Middleware SIG - There is no such thing as coincidence :)

Access the all presentation following: http://tinyurl.com/zt7hx8k

Thank you once again to UKOUG for the invite to participate in such event.


Thursday 12 May 2016

Oracle SOA - Bypass payload validation when using Mediator

If you have been using SOA 12c actively you are probably a fan of XQuery for your XML transformations by now.

You might have noticed that when generating an XQuery transformation on a Mediator, by default, your payload will be validated against the schema definition.

Let's use the following example:

xquery version "1.0" encoding "utf-8";

import schema namespace bpe="http://xmlns.oracle.com/Application1/Project1/BPELProcess1" at "../Schemas/BPELProcess1.xsd";

declare variable $in.payload as schema-element(bpe:process) external;

declare function local:mediatorTransform($in.payload as schema-element(bpe:process)) as schema-element(bpe:process) {
    validate {
        <bpe:process/>
    }
};

local:mediatorTransform($in.payload)

Above, in red, you can see that the generated XQuery transformation uses the validate expression which will perform the aforementioned payload vs schema validation.

In certain situations you might not want this validation to be performed.
Looking up at the W3C definition for the used type, we can see:

  • schema-element(customer) refers to an element node whose name is customer (or is in the substitution group headed by customer) and whose type annotation matches the schema type declared for a customer element in the in-scope element declarations
while:
  • element(customer) refers to an element node named customer with any type annotation


So, if you don't want the XQuery transformation to perform the validation simply change the following on the generated XQuery:

  • Change the declared variables from schema-element to element
  • On the function declaration, change the variables from schema-element to element
  • Remove the validate {} expression

Taking the example it would become:

xquery version "1.0" encoding "utf-8";

import schema namespace bpe="http://xmlns.oracle.com/Application1/Project1/BPELProcess1" at "../Schemas/BPELProcess1.xsd";

declare variable $in.payload as element(bpe:process) external;

declare function local:mediatorTransform($in.payload as element(bpe:process)) as element(bpe:process) {
    
        <bpe:process/>
   
};

local:mediatorTransform($in.payload)


The opposite case is also viable. If you want to force payload vs schema validation in your XQuery validation just apply the changes above in reverse to achieve it.


Tuesday 26 April 2016

How to expose and secure SOAP Webservices from Oracle B2B

There are many ways to integrate with you Oracle B2B through the use of SOAP WS and B2B supports both inbound and outbound message exchange.

This post provides an insight on how to expose securely SOAP web services to your trading partners.

As any channel to be consumed by your partners, you have to set it as a B2B Listening Channel. For that, B2B offers two flavors:

  1. Generic SOAP WSLD: based on default and simple B2B WSDL with just a SOA Header and a AnyType Body;
  2. Customized WSLD: you will need to upload your own customized WSDL to B2B that may content a richer payload structure.

Create a Web Service Listening Channel

The steps to create a new SOAP Listning Channel are similar to the steps to create any new Listening Channel: 
  1. Administration > Listening Channels
  2. Add a new Listening Channel
  3. Set the Name and the Type to Generic WS-1.0

Now is time to configure the listening channel based in your options.


Generic B2B WSDL

Using the generic WLSD SOAP is probably the quickest and easiest way to provide a Web Service interface to your partners. It relies on a default WLSD that accepts an AnyType, therefore accepts anything as a payload (e.g. HL7, EDI, XML, etc). 

For that you just have to select Use Generic SOAP and pick the default Service and Port. The endpoint URL are the one specified. Be sure that the Channel is Enabled at the Channel Attributes tab and you are good to go.

Access your SOAP Web Service at: 

http://<hostname>:<port>/b2b/services/ws/MyCompany_ListeningChannel

Customized WSDL

The second option is to use a customized WSDL on your own. Depending on the complexity of your payload you may have to create new B2B messages to be able to expose your service correctly.

To create a customized SOAP WS Listening Channel you have to upload your WSDL file. You can import an WSDL having the inbound/outbound messages defined either in an schema inside the WSLD itself or upload a ZIP file containing various dependent XSDs or WSDLs files imported by the WSDL file.

These are the steps for uploading your WSDL:
  1. Administration > WSDL
  2. Click on the + button
  3. Specify a WSDL Name
  4. Browse and select the root WSDL

Once again, remember that you have to specify the body message as a new B2B document so B2B can process the document as any other document being received by B2B. 

Now its time to configure the Listening Channel, but this time using the uploaded WLSD

Select the Service and Port you want to expose (i.e. one WSDL can contain multiple services)


Securing the exposed Web Services

Finally, a very important action before you publish the services to your partner is to secure those services. Good news is that B2B integrates with the Oracle Webservice Manager product of SOA Suite. So, directly from the B2B console you can attach and detach WSM policies to your exposed services:

Select the policies to apply.


More details on how to use the Oracle Webservice Manager policies: https://docs.oracle.com/middleware/1212/owsm/

Handling your payload message

It is important to note that there is a feature on B2B that allows you to extract a raw payload (HL7, EDI, etc) from an element of a SOAP message. This comes very handy when you want to receive a raw message assigned to any element on a XML message.

The option is accessible from the Exchange Protocol Parameter tab of the created Listening Channel.


Tuesday 19 April 2016

Configure an SSL SMTP in Oracle B2B

Oracle B2B offers email Channels “Generic eMail” to send and receive the messages through email.

This can be configured to communicate using your own Mail Server or partner's email server. 

The general configuration steps are available in the link below:
http://www.oracle.com/technetwork/middleware/b2b-integrations/learnmore/tnb2b11g003-326858.pdf

However, to be able to configure the e-mail channel using SSL, some extra steps are necessary:

Outbound :  Generic Email over SMTP using SSL

1) As part of trading partner delivery channel “Enable SSL” to be checked.
2) Provide the appropriate SSL port as part of port.


Inbound : Generic Email over IMAP/POP3 using SSL

1) As part of admin listening channel “Enable SSL” to be checked;
2) Select the email server IMAP/POP3. It will be treated as IMP/POP3;
3) Provide the appropriate email server SSL Port.


An email server’s certificate needs to be generated and imported in your ssl trust store.

The way to retrieve the certificate will depend on the email server you are using. You will find many information about how to import ssl certificates to your weblogic trust store.

If you use the default ssl trust store on Weblogic (DemoTrust) the 
-Djavax.net.ssl.trustStore=<fmwhome>/ wlserver_10.3/server/lib/DemoTrust.jks


Tuesday 12 April 2016

What those extra Healthcare flags on Oracle SOA 12.1.3.0.5 and 12.2.1 update are for?


Whilst upgrading to 12.1.3.05 I came across the following Post Installation actions at the READ.ME doc of the 22524811 patch:

"4 Post-Installation Instructions"

...
2. Add em property : hc.jmsAndDBSameTxn with 'true' value.

3. Following Healthcare Server properties are needed:
        - hc.sequencedEndpoints
                + ALL,<EP_1>,<EP_2> - comman separate value
                + Any endpoints after ALL will not be sequenced.
                + In this example, <EP_1> will have sequcing turned off. <EP_2> will have sequencing turned off.

Note for Bug 20029769:

 hc.HCMode (true/false, default false) - need to set to true

....

At the customer, we intended to promote the upgrade to the actual production environment and, because of this, it required further validation of the impacts of such upgrade could bring.

Since the description was not clear enough and I could not find information anywhere else, I raised a service request at Oracle Support for further clarification.

First, I would like to thanks Silviu from Oracle Support for his help and support he have been providing me for the last few years :)

And here are the conclusions of the service request and clarification of the new flags usage:

hc.jmsAndDBSameTxn -  if true, committing to the JMS for customer JMS will be on the same transaction as database.  If database is rolled back, then the message will not be committed to JMS as well. (I'm waiting additional clarification for this point and will add it here once I have it)

hc.sequencedEndpoints - There are two patterns of setting this parameter:

ALL,<EP1>,<EP2> - every endpoints excepts EP1 and EP2 are set to sequencing.
<EP1>,<EP2>,... - every endpoints defined in the property will be set to sequencing.

So, when word ALL is present, any endpoint after ALL will not be set to sequencing.
When word ALL is missing, every endpoint in the list will be set to sequencing.

You can still set the sequencing at the endpoint level configuration from the HC console. This is more a way to set sequencing in multiple endpoints in one shot.

hc.HCMode: this parameter was introduced for fixing a problem (FA_RETRY_TIMEOUT exception) and it's very similar of the parameters b2b.MLLP_HA_Mode=true and b2b.HAInstance=true when these settings are needed when running in clustered environments.

If you enabled it (hc.HCMode = true), then it is not expected you to deploy B2B agreements. If you want to implement MLLP agreements in B2B, and use B2B agreements, then you will have to set hc.HCMode = false.  It's not possible at the same time to use both HC and B2B engines (to deploy B2B agreements and also to activate HC endpoints).

Thursday 29 October 2015

Integrate Oracle SOA Healthcare and Oracle SOA Suite back-end composites across segregated domains (Part 3 of 3)

The third and last post of the series  "Integrate Oracle SOA Healthcare and Oracle SOA Suite back-end composites across segregated domains" covers the creation of the back-end SOA composite, that acts as the man in the middle between the two configured SSHI endpoints. The post also covers how to perform the testing of the implementation using the HAPI Testing Console.

As guidance, this series is divided in:
  1. Part 1: Configuration of the separated domains and JMS artifacts
  2. Part 2: Healthcare (SSHI) configuration
  3. Part 3: SOA Composite and Testing

At the end of the article you may also access the list of artifacts produced for this exercise as to a sample message.

SOA Back-end composite

The composite to be created will be constituted by three main elements:
  1. Healthcare Adapter: Exposed service to receive messages from the Healthcare (SSHI) thought the inbound JMS queue
  2. Mediator: to deliver the message and its properties to the outbound Healthcare Adapter
  3. Healthcare Adapter: Reference able to send messages to the SSHI environment through the outbound JMS Queue
Create the SOA Application and Project

Create a new SOA Application with the name: soabpmfusion and a project called: sshi-jms-hub


A new empty composite is created


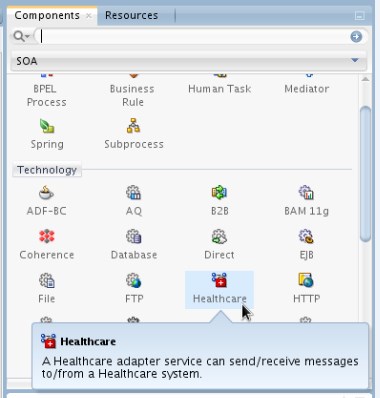
Start by dragging and dropping  an Healthcare Adapter from the components box to the Exposed Service lane


A new wizard pops up and the name hcService can be left as the Healthcare Adapter service name


For integration type, select JMS


This time point to the Healthcare (SSHI) domain connection. If it is not created yet, create a new Application Server connection to the newly created SOA-Domain (Domain B)


Since we will receive the HL7 messages arriving from the SSHI domain set the operation as Receive.


There are many options to define the Document handling of the adapter. The message XML schema can be imported from the SSHI to the composite allowing the local consumption of the XSD, it can be referenced from the MDS, use an XSD file from a local location or even receive the message as Base 64 opaque mode. Each of the options has its applicability, however, for this sample, lets select to import from the SSHI the XSD to be used in the composite.


Pick the ADT_A03_def from the document repository on the SSHI.


After all SSHI related configurations are complete, time to define the details for the integration between the SOA Domain (Domain-B) and the SSHI Domain (Domain-A).

Select the Oracle Weblogic JMS option


The next step is about defining the connection to the server where the JMS queues are available. In our sample the JMS queues are available from the SOA Domain. Go head using or setting the connection. If not available yet in your JDeveloper, create it a new connection pointing to SOA-Domain (SOA-B) and select it from the connection options.


Is in this new wizard window that the queue and the JmsAdapter Connection Pool JNDI name are configured. Use the browse button and the magnifiying glass icon to search and select the desired details

Destination Name Queue: jms/hc/SSHIInboundQueue
Message Body: BytesMessage
JNDIName: wis/wls/SSHI_HL7_IN


It is now time to add a new Healthcare Adapter, this time as a composite Reference


And name it as hcReference


The configuration will be similar as the outbound, except that the operations will be Send instead of Receive and the Queue and JNDI Name should be configured as:

Destination Name Queue: jms/hc/SSHIOutboundQueue
Message Body: BytesMessage
JNDIName: wis/wls/SSHI_HL7_OUT


Time to finalize the composite adding the mediator to connect both Healthcare Adapters


Add a new mediator component with the name SSHIMediator defining the Interface Later


Wire the components


The mediator has the mission to assign the message payload together with healthcare properties to the reference Healthcare Adapter. Typically, in a In Memory integration this is achieved using the hc.<property> elements available, but, since the jca.jms is being used, the jms property structure will need to be used instead.

The HC properties to be filled and delivered through to the SSHI are:
  • Document Type Name (DOCTYPE_NAME) - Copied from the inbound
  • Document Type Version (DOCTYPE_REVISION) - Copied from the inbound
  • Destination Endpoint (TO_ENDPOINT) - "SSHI_OUTBOUND_MLLP"
  • Message Sequence Id (INTERFACE_SEQUENCE_ID) - Copied from the inbound
  • Message Id (MSG_ID) (generated by generateGuid() function)


The image above depicts the following source code:

<assign>

<copy value="$in.property.jca.jms.JMSProperty.DOCTYPE_NAME"
 target="$out.property.jca.jms.JMSProperty.DOCTYPE_NAME"/>

<copy expression="'SSHI_OUTBOUND_MLLP'" target="$out.property.jca.jms.JMSProperty.TO_ENDPOINT"/>

<copy value="$in.property.jca.jms.JMSProperty.DOCTYPE_REVISION"
 target="$out.property.jca.jms.JMSProperty.DOCTYPE_REVISION"/>

<copy value="$in.property.jca.jms.JMSProperty.INTERFACE_SEQUENCE_ID"
 target="$out.property.jca.jms.JMSProperty.INTERFACE_SEQUENCE_ID"/>

<copy expression="ora:generateGUID()" target="$out.property.jca.jms.JMSProperty.MSG_ID"
 xmlns:ora="http://schemas.oracle.com/xpath/extension"/>

</assign>

The composite is now complete and ready to be deployed to the SOA Domain (SOA-B)

Testing

The testing will consists of sending a HL7 ADT 03 message through the inbound MLLP endpoint and expect an outbound message being sent to the outbound endpoint. The sample is finalizing with an acknowledge message successfully sent from the HAPI tool to the SSHI environment.

First, is necessary to configure the HAPI Testing Console.

Having the console initiated, lets created two connection:
  1. Sending Connections: In_Patient_Admition
  2. Receiving Connections: Out_Patient:Laboratory
Fill the details as described in the following two images:


Add the sample document to the messages tab (link to the sample message is available at the end of this post)


Start both sending and receiving connections - you should have a green sign on each.


Everything is set to test the implementation.

Select the message at the HAPI Console and, being sure that the correct Sending Connection is select and the options are configure for 1 message, press Send


A message will be sent and an successful acknowledge should be identified.


Check the message route at the SSHI Reports and observe that three messages were reported: two inbound (ADT A03 and Ack) and one out (ADT A03).


At the SOA-Domain Enterprise Manager it can be verified that the composite has been successfully completed.


It can be notice that the message went through the MLLP channel to the SSHI endpoint, was translated from HL7 raw format to XML and delivered to the internal delivery channel and through the JMS queues configured at the SOA-Domain (Domain-B).

The message is then picked from the queue by the back-end composite, delivered to the outbound internal delivery channel queue and consequently delivered through the endpoint to the MLLP Server in the SSHI-Domain (Domain A).

All the processed is finalized with the reception of a positive acknowledge from the MLLP HAPIS server.

Thank you for reading!!

Attachments